How to Create Editable Nano Banana Presentations (Current Presentia Workflow)
Many Nano Banana tools produce slides that are hard to iterate quickly. In Presentia today, the workflow is: generate in TwoStepHero, refine in /generate Edit mode, preview, then export.
This tutorial shows the current Presentia flow for Nano Banana Pro presentations: generate in TwoStepHero, refine in /generate Edit mode, then export your .pptx.
Current Presentia Workflow (Updated February 24, 2026)
Current workflow checkpoints
Step
Where in UI
What happens
1. Input
TwoStepHero
Prompt or document text is prepared for generation.
2. Generation
/generate
Slides are created progressively with visible generation progress.
3. Finalize
Edit/Preview + Export
Refine in Edit mode, then export PPTX or PDF from the toolbar.
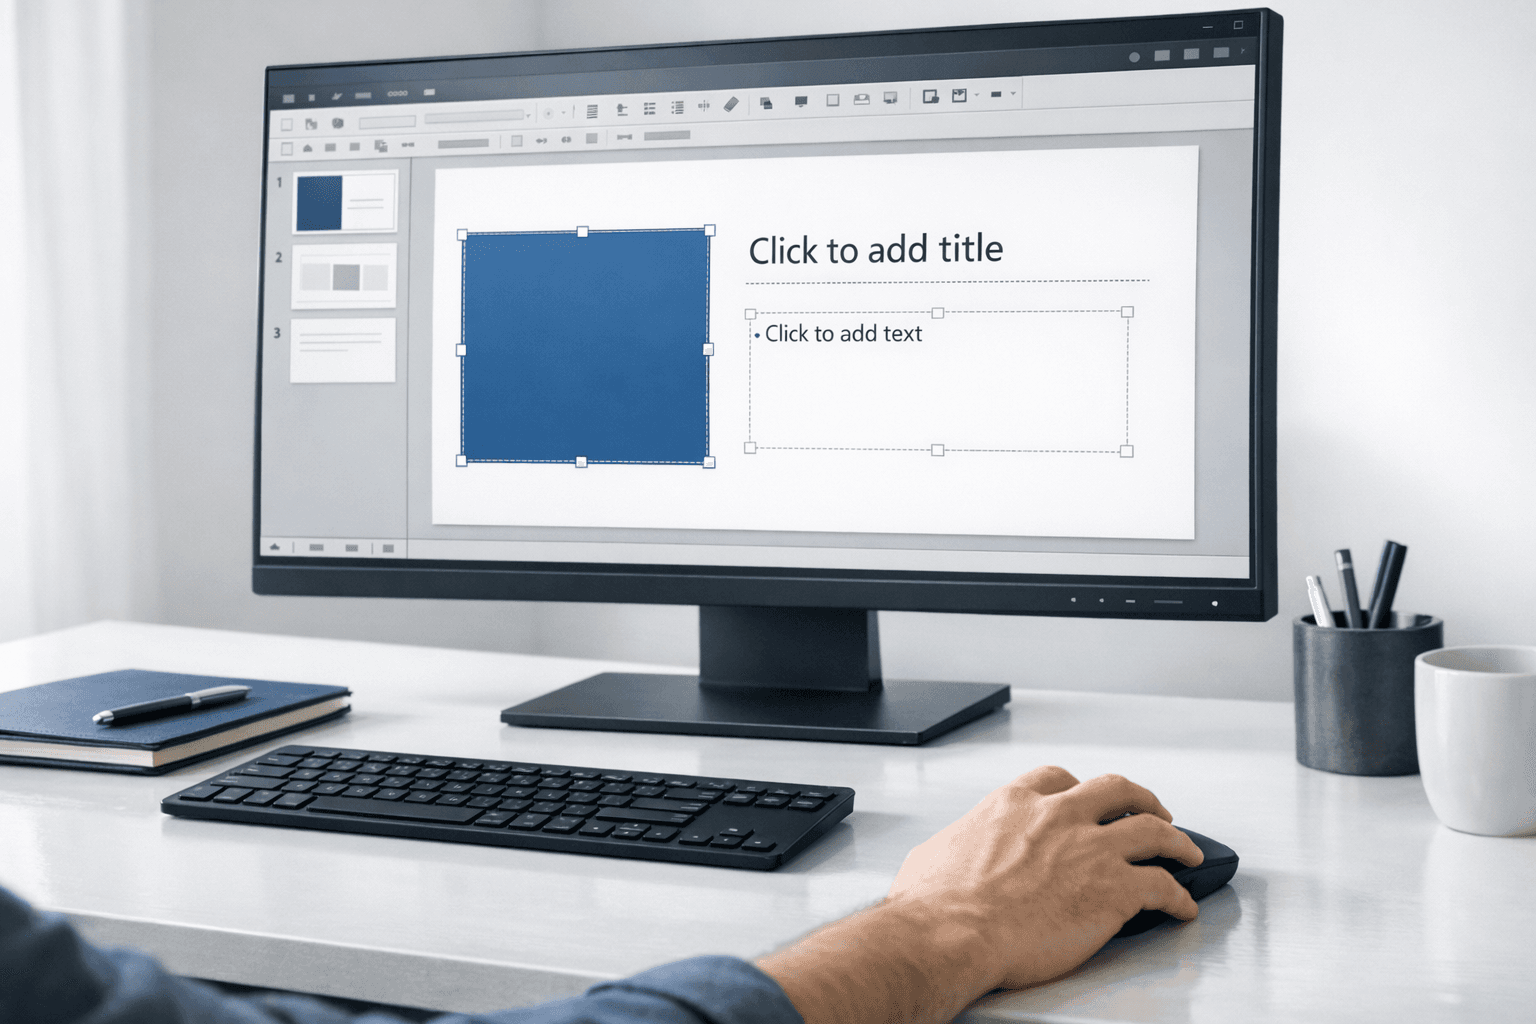
Key points visual: practical editing workflow in a slide editor.
What "Editable" Actually Means
When we say "editable Nano Banana presentations" in the current product, we mean you can refine slide content and layout inside Presentia's Edit mode before export.
In the current product, editability means refining text, shapes, layout, and visual structure inside Presentia Edit mode before export.
The practical difference is workflow control: generate quickly, refine in-app, then export only when the deck is final.
What You Need
A Presentia AI account (presentia.ai — start with 7-day Pro free trial, credit card required, not charged until trial ends)
Access to the Presentia /generate editor (desktop recommended)
Your presentation content direction
Part 1: Generating Your Editable Nano Banana Presentation
Step 1: Write a Detailed Generation Prompt
The quality of your editable presentation starts with how specifically you describe what you want. Use this structure:
[Topic] + [Slide count] + [Audience] + [Key visual elements needed] + [Any specific sections]
Example prompts:
For a business presentation:
"Sales strategy presentation for a B2B software company, 12 slides, for executive leadership audience. Include: competitive landscape matrix, Q4 vs Q3 revenue comparison chart, pipeline funnel diagram, 90-day roadmap timeline, and geographic market expansion map."
For academic use:
"Research presentation on CRISPR gene editing applications in cancer therapy, 15 slides, for a genetics conference. Include: gene editing mechanism diagram, clinical trial results bar chart, treatment efficacy comparison table, and research timeline."
For a startup pitch:
"Series A pitch deck for a climate tech startup, 10 slides. Include: market size diagram ($180B TAM), competitive positioning 2x2 matrix, product architecture diagram, unit economics waterfall chart, SAFE round structure table."
Step 2: Set Template, Theme, and Image Model
Log into presentia.ai
Open TwoStepHero (homepage) or the Generate New Presentation modal
Paste your detailed prompt
Choose a template and theme that match your audience
Set Image Model to Nano Banana
Choose your base theme color palette
Click "Generate"
Generation is progressive slide-by-slide; total time depends on slide count and prompt complexity.
Step 3: Review the Generated Deck
After generation, Presentia shows you a slide-by-slide preview. Check:
Does each slide address its intended purpose?
Are the Nano Banana Pro visuals topically relevant?
Is the overall flow logical?
Which slides will need the most editing?
Don't aim for perfection here. You're evaluating the structure, not the final product. The editing stage is coming.
If a specific slide missed the mark, use Presentia's "Regenerate Slide" feature to give that slide a more targeted prompt before exporting.
Part 2: Exporting Your Editable Nano Banana Presentation
Step 4: Export to .pptx
Click "Export" or "Download" in Presentia
Select "PowerPoint (.pptx)" format
Download the file to your computer
What you're downloading: a .pptx export from the /generate editor. When a slide has an AI preview image, export prioritizes that full-slide render for visual fidelity.
Step 5: Verify Output Quality (30-Second Test)
Before exporting, do a quick verification inside /generate:
Switch between Edit and Preview modes on at least two slides
In Edit mode, can you update text and save changes? ✅
In Edit mode, can you move/resize at least one visual element? ✅
In Preview mode, does the generated visual render cleanly (no clipping/artifacts)? ✅
Does export from the top toolbar produce a usable .pptx or PDF? ✅
If all four pass, continue final refinements and then export.
Part 3: Finalize in Presentia Edit Mode (Before Export)
Step 6: Refine content in Edit mode
Update titles, bullets, labels, and spacing in Edit mode. If one slide misses the goal, regenerate only that slide and continue refining.
Step 7: Check visual quality in Preview mode
Switch to Preview mode to validate readability, contrast, and clipping. If anything looks off, return to Edit mode, adjust, and preview again.
Step 8: Run a pre-export checklist
Pre-export checklist in current workflow
Check
Where
Pass condition
Copy accuracy
Edit mode
Headings, labels, and numbers are final
Layout quality
Edit mode
Alignment, spacing, and hierarchy are clean
Visual render
Preview mode
No clipping, artifacts, or unreadable text
Delivery format
Export modal
PPTX or PDF export downloads successfully
Step 9: Export and run a destination-app review
Export from the /generate toolbar. Open the exported file in the destination app (PowerPoint, Slides, or Keynote) for a final review pass and hand-off.
From Tutorial to Practice: Start with Your Free Trial
The best way to learn is by doing. Start a 7-day Pro free trial at presentia.ai (credit card required, not charged until trial ends). Generate one data-heavy slide and one diagram slide, refine both in Edit mode, then export from /generate.
By the time you've edited those two slides, you'll understand the full workflow from generation to export and how to finalize quality before download.